Does your bathroom sink need to be replaced?
If you hire a professional for the installation of a Bathroom sink may cost you $1000 because plumbing work is costly. The right tools and materials and a little knowledge about it will save you a lot of money.
You may want to replace the bathroom sink due to renovation, leakage in the plumbing work, or corrosion on the old wash basin. Let us look at the following step-by-step guide to learn how you can install a bathroom sink.
How to Install a Bathroom Sink?
- Turn off the water supply.
- Take out an existing sink by removing all its components.
- Fix a faucet in the new sink.
- Apply a bead of caulk around the sink edges and install it on the hole.
- Leave it for one day to dry it completely.
- Install the drain of the sink.
- Reconnect all its components.
Tools and Materials Required
- Bucket
- Slip-joint pliers
- Screwdriver
- Cloth
- A new set of Sink
- Silicone caulk
- Paper towels
- Plumber’s putty
- Mop
- Putty Knife
Method of Bathroom Sink Replacement
Follow the steps given below to install a sink in a bathroom. These procedures are general; different sinks have different ways of installation. You must read the manual provided with your product before replacement.
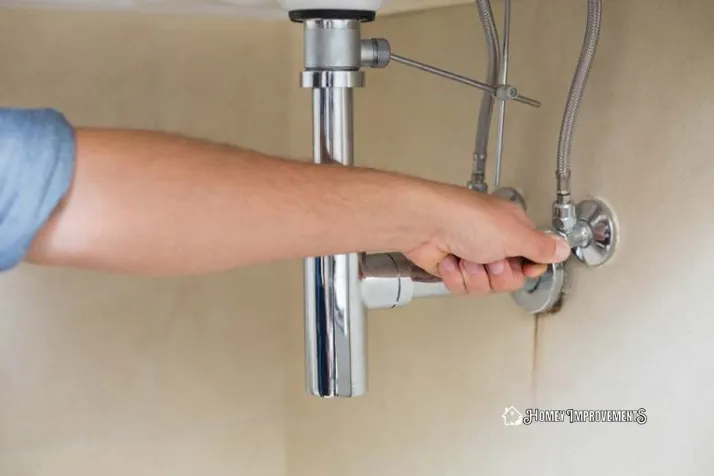
 Step 1. Close the Water Supply
First, turn off the water source by the two valves under the sink. Turn these valves to close the water flow and check the sink’s faucet to see whether the water flow is shut.
Check the hot and cold water taps before going to the next step. Ensure the water valves have closed properly; if water flows from the faucets, turn off the main valve of the water supply that provides water to the whole house.
 Step 2. Removing the P-Trap
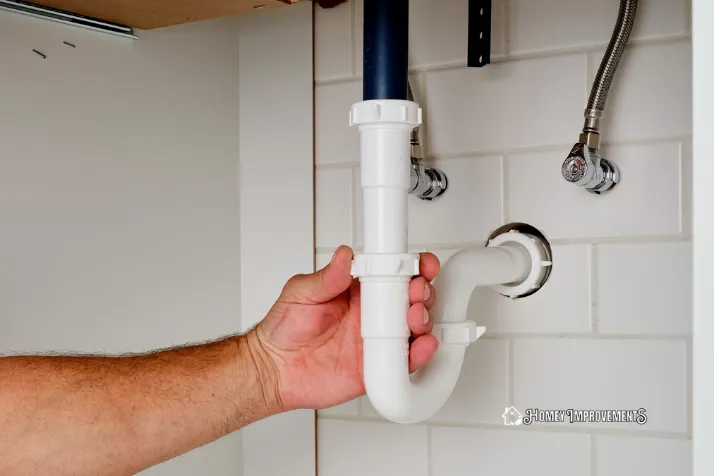
After turning off the water supply, you will remove the drain pipe’s P-trap in this step. For this purpose, place a bucket under the sink because when you disconnect it, water will come out.
Keep a mop with you to clean the floor if water spillage occurs. Unscrew the nut with a hand or a plier. Completely removing the P-trap is not necessary, but it’s a good chance to take it out and clean it thoroughly before installing again.
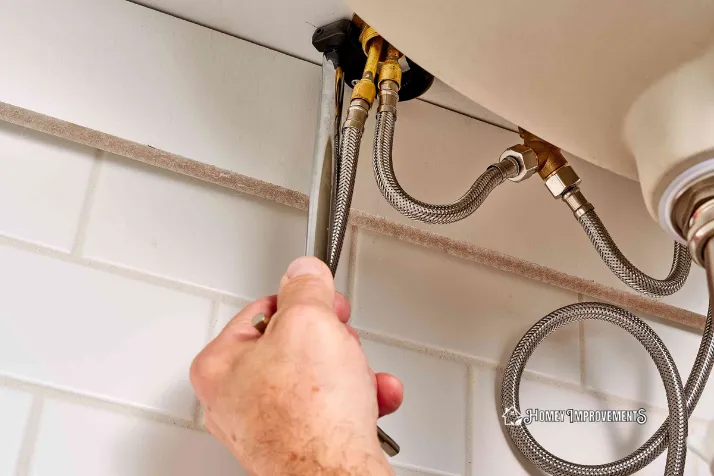
 Step 3. Cut Off the Water Lines
Use pliers to disconnect the water lines.
 Step 4. Removing Bolts
There are different types of bathroom sinks. Some need bolts during their installation process. You will need to remove these bolts if you have the same one.
 Step 5. Removing Caulking
If your restroom sink is attached to a counter, there must be a sealing around the sink’s edges. Cut out this caulking with a putting knife to separate the sink from the counter.
 Step 6. Separating the Sink
In this step, you must take it out completely. There are two types of counter sinks:
Drop in Sink Bathroom
In this type, the bathroom sink is installed from above. To remove it, you have to lift it from above.
Undermount Sink
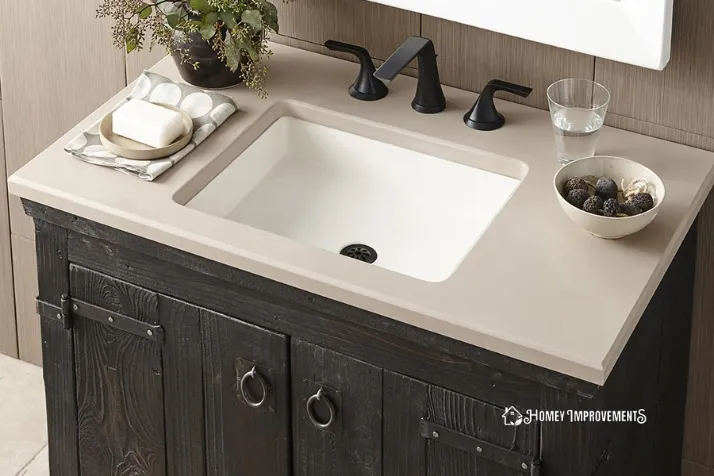
An under-mount sink should be installed from below. It should be removed from underneath. While removing the sink, be careful, so the counter does not get damaged.
Make sure, before buying a new sink, you have measured all the dimensions, like measurement of length, width, and depth.
It’s a good idea to remove the sink from the hole, and before purchasing a new one, you measure its dimensions correctly.
If you have chosen a sink with a different dimension, you must adjust the countertop’s hole with the size according to your selected sink. It’s a tricky task, so you must hire a professional to do it properly.
 Step 7. Installing Bathroom Faucet
Faucet installation is easy in any sink. It comes with a new product set, but you can install the old one if you like.
To install the new one, follow all the directions mentioned in the manual with the product. In the case of installing the old faucet, remember its steps of removal so that you can re-install it again correctly.
 Step 8. New Sink Installation
Before installing the new sink, ensure you have completely removed caulking around the hole. Use a putty knife or a screwdriver to scratch the residues from the counter. Now, clean it using a cloth.
If installing a drop-in sink, put the silicone caulking on the inner side to perfectly attach the sink to the hole. The sealing will create a waterproof block to prevent water from falling off.
When replacing the under-mount sink, you must put the sealing around the hole’s edges on its top. You can use bolts or clips to firmly fit the sink inside the hole.
Replacing the under-mount sink is difficult if a partner is not helping you because you have to fit it from the underside. So, when fitting the bolts, you should ask someone to hold them.
Drop-in sink installation is easy in this case because you have to place it on the hole from above, and the sink fits. You can secure a piece of wood for an undermount sink fitting. In this way, you can easily complete the project by screwing the bolts.
 Step 9. Wait for 24 Hours
After completing all the above steps, leave it for one day so the sealant dries completely before moving to the next step.
 Step 10. Replace Bathroom Sink Drain
In this step, you will place the drain. If you have to install the new one, read its instructions step by step and follow it accordingly.
You can also install the old one, but remember the actions while removing it to fit it again. To put in it, apply the plumber’s putty around the sink’s hole and firmly fix the drain on it.
 Step 11. Re-Joining the Water Lines and P-Trap
Reattaching the water lines and P-Trap is a simple process, and you can use pliers to connect them using nuts and screws.
You must remember the steps during the removal process of the P-Trap and water lines, so the same can be used to put them again.
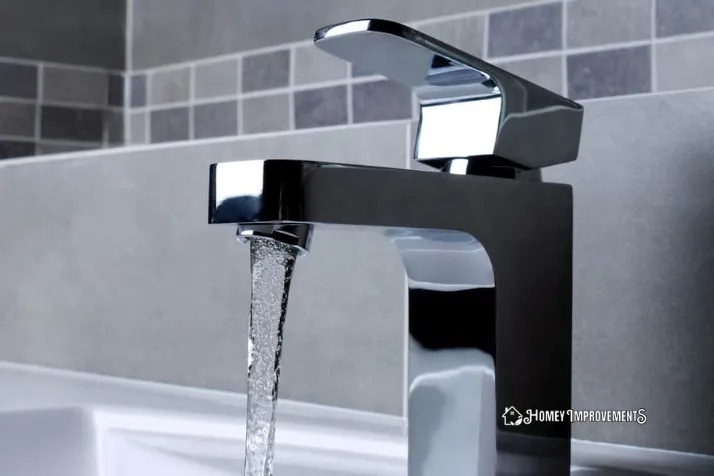
 Step 12. Test the New Sink
After completing all the steps, turn on the faucet and keep the water running to check all the water lines. Open both taps of cold and hot water. If you feel any sort of blockage or water is flowing slowly, clean the faucet and check again. Dirty faucets can usually cause issues in the flow of water.
Check all the parts by touching your hands. If you feel no moisture, there is no leakage, and you have successfully completed the installation process.
Types of Sink
Bathroom sinks are available in different styles, so you can select from the types you like. However, every sink requires a unique way of installation or replacement.
Vessel Sinks
In this type, the sink is located on the top of the counter, creating a modern and spa-like look. Usually, they are made of glass or glass-like china, which looks beautiful but is not so durable.
On average, the price of ceramic or china washbasins is $100, while glass collection costs between $150 – $300.
Drop in Sinks
These models are easy to install because they are fixed in the hole of the counter. There are lips on the sides of the basin that hold the sink in place.
They are made from different materials, and their prices range from $40 – $1000, from basic china products to copper and bronze models.
Undermount Sink
These sinks don’t have a lip on the edges of the counter, giving them a seamless look. They are installed from the lower side by fixing the bolts and applying invisible caulking.
Its installation is a time-consuming project, so the professionals take high charges to install it. Like a drop-in sink, its price depends on its material. The cost of glassy china models is $50 or $60, while bronze models charge more than $900.
Pedestal Sinks
These sinks deliver a vintage look because they are free-standing. However, they don’t have cabinets or storage space. Depending on its design’s complexity, its prices can be $450 or above.
Tips to Install a Bathroom Sink
Follow these tips to get a successful bathroom sink installation.
Different Types of Sinks Need Their Unique Way of Installation
The method to install a sink mentioned in this article is general. Every type of sink has a specific installation, but there is only a slight difference in some of the steps.
If you are installing a wash basin different from a drop-in or under-mount sink, install them according to its method.
While installing a pedestal sink, you must be very careful about where you are installing it. There should be a proper distance between the sink and other items.
Every component of the bathroom should be kept in mind. For example, there should be enough space to open the cupboard door easily.
Removing a Sink if It’s Fixed with Glue
If the sink you have to replace is fixed with glue, you must use a hammer to separate it from the counter.
Know Your Skills
Replacing a sink is not a complicated task; you can do it with little knowledge. However, sometimes some steps will be difficult, for example, if you are installing a basin larger than the counter hole.
Before starting the project, you should consider your knowledge of whether you can DIY it or not. If you can feel any difficulty, contact a pro.
Charges to Hire a Professional
Since many different things affect the price, its average installation price is $496. For example, removing the current sink will cost $20 – $100. Generally, the price to install the sink professionally is $178 – $1410. This price depends on how time-consuming the project is, the materials used, and how the sink is fixed.
Consider the following prices:
Tile Sink
Due to its time-consuming project and tile-setting preparation, it cost $386 on average.
Metal Sink
These sinks are available in different styles and are a cost-effective option. Its price is around $178.
Porcelain and compound Sinks
These washbasins are available in different styles:
Mounted Sink
These sinks do not need the support of cabinets under them, but the professional has to make sure that the wall is strong enough that the sink will not fall off. So, on average, its installation process can cost around $211.
Surface Mounted Sink
These are made of porcelain, which is a bit difficult to install. On average, its installation cost near $194.
Undermount Sink
More work is required to install an under-mount sink; therefore, it becomes a long process. Hence, its installation requires around $229.
FAQs – Frequently Asked Questions
How to Install a Bathroom Sink?
- Gather all the required tools and materials.
- If there is no hole in your countertop, create it.
- Apply caulk around the sink.
- Fix it on the countertop.
- Secure it with bolts.
What is Required to Install a Vanity Sink?
- You must have all the necessary equipment to install it.
- Measure the dimensions of the existing vanity top and vanity itself to buy the new one with the correct size.
- Remove the old sink.
- Take out the top of the vanity with the help of the partner.
- Now, mark its dimensions on the wall with a pencil.
- Install the new vanity to the wall and attach its top to the base.
How to Install a Sink Basin?
- Apply the sealing around the base of the basin.
- Place it on the counter’s hole.
- Wait for the caulk to dry.
- Install its drain.
How to Install a Sink of Porcelain?
- Apply a silicone bead around the edges of the counter hole
- Place the porcelain sink firmly over it.
- Remove the extra caulk with a paper towel.
- Leave it for a day to dry.
What is Necessary for A Bathroom Sink to Hold in Its Place?
Most sinks are fixed with silicone sealing, while some require glue to set them in their place. You can use bolts to hold them.
Final Thoughts
Bathroom sinks are available in different types; every type of sink requires a distinct installation. So, in this article, I have given some general guidelines for installing a bathroom sink.
There is only a slight difference in their installation procedure. Make sure you don’t buy a sink larger than the hole’s size. If you purchase it, you will require additional work to make it large and it will cost you more by doing it professionally.
 Step 1. Close the Water Supply
 Step 3. Cut Off the Water Lines
 Step 4. Removing Bolts
 Step 6. Separating the Sink
 Step 9. Wait for 24 Hours
 Step 10. Replace Bathroom Sink Drain
 Step 12. Test the New Sink
Leave a Reply