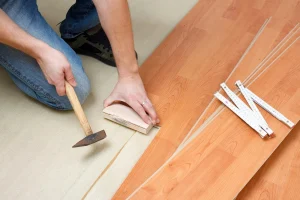
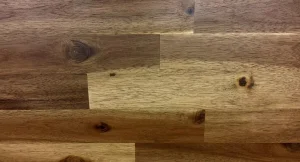
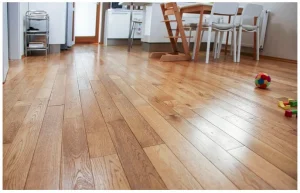
Vinyl plank flooring is the easiest yet most affordable way to increase your house’s aesthetics. While installing these floors, one thing is to be kept in mind: how to stagger vinyl plank flooring and what techniques are ideal for this process.
Similarly, you do not have to be a master or a pro to stagger vinyl plank floors. But staggering the vinyl plank flooring does require some possible planning and forecasting.
Vinyl planks usually come in similar sizes, making it difficult and challenging to stagger them. This article will perfectly explain the proper way and technique to stagger your vinyl plank flooring.
Tools Required
Here are some of the essential tools and materials that are required during the staggering process:
- Pencil
- Tapping block
- Insulation
- Vinyl planks
- Tape measure
- ¼ inch spacers
- Utility knife
- Safety gloves
- Replacement blades
Guide to Stagger Vinyl Plank Flooring
Here is a complete guide for beginners who are looking to stagger vinyl plank flooring on their own. Simple follow the steps mentioned ahead and you will be able to complete this DIY task in no time:
Step 1. Getting Familiar with H Joints and Step Patterns
To start off the staggering procedure, you first need to lay down the planks and make sure you avoid the formation and pattern of H joints.
When it comes to installing vinyl planks, it’s better to avoid these two patterns and formations. H joint comes to formation when the first row of plank meets the end row of the third plank, resulting in the shape of the H pattern.
What this pattern does is that it takes away the beauty and aesthetic of the vinyl plank flooring. Making it clearly visible that the installation is done by an amateur and not a professional.
The H joint pattern can also result in a weaker base of the planks and simultaneously increase the risk of loosening the planks in the future.
Another minor drawback of it is using the step formation; now, what happens is that the step formation occurs when the first and second-row formation is repeated in the third row.
This allows the pattern in a traditional way, unlike the staggered pattern you are looking for.
Step 2. Understanding the Spacing Rules
The process of staggering the vinyl planks is to know how to space your planks properly. Once you know how to space between the planks properly, then you are one step closer to staggering the vinyl planks.
Usually, the vinyl planks are 2-3 inches wide in width, so the ideal spacing rule to follow is the 6-inch spacing rule. However, if you have wider planks, then it’s possible to increase the spacing from 8-to 10 inches.
But on the other side, increasing the space have more chances of forming the H joint.
Step 3. Determining the Number of Planks Needed
For this step, it would help to use the tape measure to measure the width and length of the room accurately. By measuring the room’s length, you can easily get to know where to place the planks accordingly.
Using the tape to measure, you can also determine the accuracy of the size of planks required to be used in the first and the last rows. In order to properly stagger the planks, these rows must be divided into the same size.
If you feel that the planks placed in the last rows are smaller than the first row, then it is the right time to trim of the larger planks.
Step 4. Finding Out the Correct Stagger Spacing
It is essential and important to know the right spacing points between the endpoint of the planks.
Because to find out the right stagger spacing, you will require the size and shape of the last and first rows of your vinyl planks. You can use the tape measure to find out the exact length of the room.
Then it’s time to divide the length of the room by the length of the planks. The answer you get is if it is above 6 inches, then you need to start the first row with the whole of the plank.
But if the answer is lower than 6 inches, then you need to cut the plank into 1/3 of the whole plank and start with the row.
Step 5. Mixing the Planks Up
The thing to keep is that while removing the vinyl plank from the boxed, you need to mix the planks and pick different shaded planks. That will give you a more natural look at the floor.
This will also help to stagger with different shades of the vinyl plank floors.
Useful Tip:
It would be best to leave the planks in the room for at least 48 hours to harden these planks.
Step 6. Time to Install the First Plank
To start with the first plank, pick the first board from the bundle, then get a utility knife to trim the edges off the tongue of the plank. After the trim, it’s best to lay off the plank on the floor facing the tongue side.
During the installation of these vinyl plank floors, make sure to keep the difference of approximately ¼ inches from the walls.
This space difference will allow the planks to expand and contract when needed during the climate and other changes. After laying the first plank, it’s time to cover up the entire length of the floor.
It’s important to keep the first row larger than 6 inches. At the same time, the last row should be lesser than 6 inches in order for the planks to settle down accurately.
You can keep the cutoffs if there are any while trimming the edges to fill up any gaps between the rows of planks.
Step 7. Installation of the Second Row Planks
For the second row installation, you can use the cutoffs to begin the process. You can lay down the planks making sure that they are 6 inches from the joint of the first row.
This will allow you to stagger the first and second row with ease. As you reach the end of the second-row plank, it’s time to cut the plank for the best fit.
Try not to use the second-row cutoff for the third row because then you will see the same pattern, which will ultimately result in the step pattern that you don’t need.
Step 8. Third-Row Plank Placement
To begin with the placement of the third-row plank, you must pick the whole plank and make sure to cut it in a random length that is also 6 inches away from the closest. Keep in mind not to create the H joint and avoid it.
Step 9. 4th-Row Plank Placement
Starting the fourth-row placement of the vinyl plank, you can use the offcuts from the second row. These mix-ups of using the offcuts will not cause the H joints or even the step pattern.
So, to keep the different angles and shapes, it’s essential to keep them in mind while installing these planks.
Similarly, for the fifth row, you can use the third-row offcuts, and further for the 6th row, you can use the 4th-row offcuts, or it’s better to cut the new plank at a random length to create a different pattern flow.
It would help to continue this pattern following the procedure until your whole room is covered with vinyl plank flooring.
Some Important Tips
- It is important to keep a packaging sheet while you are cutting the planks, to avoid the sticky side collecting any dust and dirt while working.
- You can save the cutoff and shorter cut planks to be able to use them further for any other room.
- While cutting the planks, you must use a properly sharped blade knife as a dull knife can ruin the texture of the planks.
- Store the planks in a room before installation to harden their planks.
- Once the spacers are removed, it requires around 14-16 hours to settle down properly.
- Make sure to mop the floor using the steam, traditional, or electric mop after you are done with installing the planks to avoid any mess.
FAQs – Frequently Asked Questions
How Do You Stagger Vinyl Plank Flooring?
To stagger the vinyl plank flooring, it’s best to play with the spacing range between the rows to be placed on the planks. And to avoid the H joint and step arrangement of these planks.
What Is the Stagger for Vinyl Flooring?
The usual range should be between 6 inches, while it can also reach the max of 8-10 inches of space between the vinyl planks.
Should Laminate Flooring Have a Pattern?
It’s best to avoid using a pattern for laminate floors and use rather a different random stagger for each row to make it look more natural.
Where Do You Start when Installing Laminate Flooring?
To install the laminate floors, the ideal way is to start it with a straight wall and lay the first row letting it join the edges of the boards. If you don’t have any spacer, you can also use the cutoff for this process.
Conclusion
The process of staggering your vinyl plank floors can increase and enhance the overall look of the flooring.
Whereas it’s not a very hectic procedure, it should be performed very carefully to avoid keeping the step pattern and forming an H joint. Also, keep in mind to use the safety precautions while installing the vinyl plank floors.
With the information provided in this article, we hope you will be able to stagger and install the vinyl floors at your house with ease to make it look more pleasing and aesthetic.


Leave a Reply