If you want to install the tiles as a DIY project without any expert need, and don’t know anything about how to lay peel and stick tile then this guide will help you.
With all the required tools and basic knowledge, you can surely complete this work so why not go through the entire procedure in detail for your understanding?
You do not need to use any kind of adhesive while putting these tiles on the floor because of their sticky nature, as the name defines itself. Without wasting much time, let’s begin our installation method guide.
How to Lay Peel and Stick Tile?
Peel and stick tiles can be done with DIY installation. Gather all the tools required for this work so that you can complete the work on time quickly.
The first step is to prepare the surface by removing the old baseboard, getting rid of uneven surfaces (if any), and sweeping the floor so that it is all ready for the new installation.
Do not forget to buy the right amount of tiles with proper measurements so that they do not get short. After this, take a chalk line and mark the spot so that placing the tiles becomes simple for you.
Start peeling the back side and immediately put the tile starting from the first row and proceeding with the last one. Once the entire room is done, do finishing with a vinyl roller that you can also buy on rent. After finishing, grouting is also important (if required).
Time Taken
We spent a few hours laying the peel-and-stick flooring, aiming for perfection, and successfully completed the task within that timeframe.
Tools and Materials to Install Peel and Stick Tile Floors
Here we have combined the list of all the materials and tools you must have if you want to avoid any kind of inconvenience in between the work. The items include:
- Pair of nippers
- Putty knife
- Pry bar
- Dustpan
- Dust mask
- Eye protection goggles
- Stiff-bristled broom
- Vacuum cleaner
- Latex primer
- Chalk lines
- Utility knife
- Rollers
How Much Flooring Do You Need to Buy? Let’s Figure It Out
To calculate the amount of tile needed for your project, measure the length and width of your room in feet and multiply the two numbers to obtain the total square feet.
To account for cuts and errors during installation, it’s recommended to add an extra 10% to the total square feet. This will also provide some leftover tiles for future replacement or return.
To determine the total amount of material needed, use the following formula:
Length x width of the room = Total sq. ft.
Total sq. ft. + (Total sq. ft. x .10) = Amount of tiles to purchase
Peel and Stick Vinyl Plank Flooring Installation
While installing these tiles, ensure not to lay them incorrectly because they have a sticky nature and once you have laid them down, you won’t be able to move them.
The only option you will be left with is the replacement. Carefully, follow the below-mentioned points if you want to do a successful installation.
1. Prepare the Floor
Firstly, you have to prepare the floor so that you can make it ready to install peel and stick tiles. For this purpose:
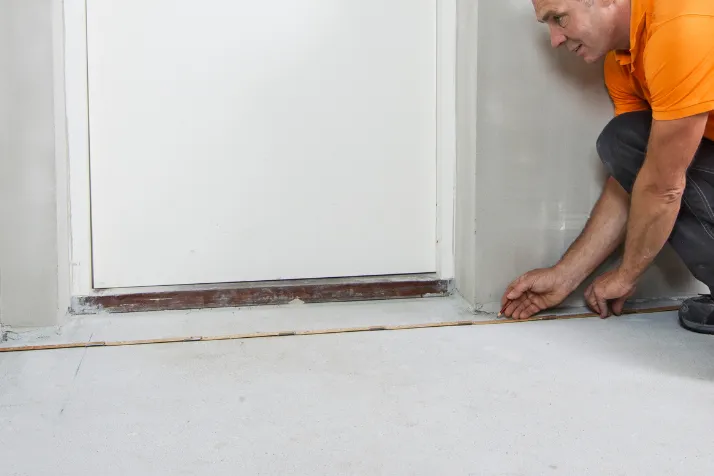
Pull out the Baseboards
In order to pull out the baseboards, you have to lose all the nails that have made the boards tightly installed on the floor. You can pull them out with the help of a pry bar or you can also take the help of a putty knife.
The pair of nippers are also accessible in different stores in case you are still not able to remove these nails completely from the walls.
Remove Uneven Flooring
The best thing about peel and stick tiles is that you can install them on the existing flooring as well however, that flooring must be even. If it is not, you have to get rid of them.
There must be no cracks or holes on the floor otherwise, your tile won’t stay for long and all your hard work will go in vain. Once the uneven flooring is removed, you have to eliminate the old adhesive that you used to install the old flooring.
For this purpose, you can make use of a floor scraper.
Make the Place Tidy
In all this process, the floor must be full of dust so before proceeding to the next step, do not forget to make the surface tidy by removing all the small and large dust particles. You can apply a vacuum cleaner to the surface that will lift the dust in a better way.
Use a latex Primer
Many people assume that it is not necessary to use a primer however, it is vital if the subfloor is composed of Concrete or wood.
Once you are done with the primer, let the surface completely dry for at least 24 hours because there should be no moisture before installing these tiles.
2. Install the Tiles
Now you have prepared the floor and it is all ready for the new installation, so begin the actual work.
Do Proper Measurements
You have to measure the room where you will do an installation to get an idea that how many tiles you will need to complete this work.
Take the proper length and width and then multiply it to get an idea about the room’s area. Whatever the total is, add an extra 15% in case any tile is broken or damaged.
Measure the Room’s Width
While taking the width, do it on 2 different sides, and with the help of a chalk line, mark a spot at the center. You have to make a perfect square in order to easily fit tiles on the floor.
Start Peeling the Back of The Tiles
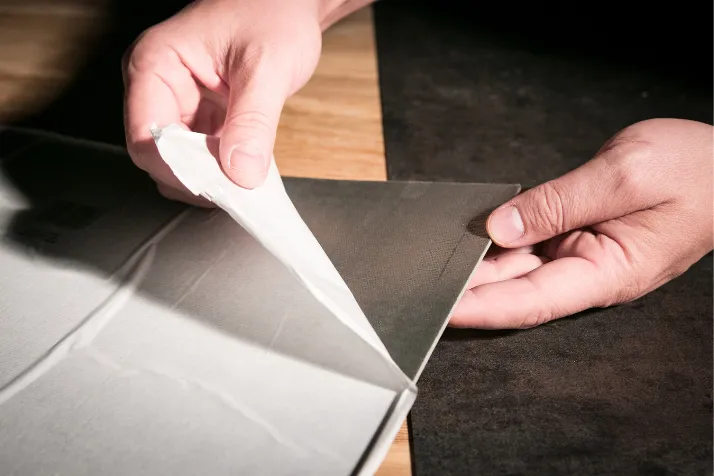
After taking accurate measurements, it’s time to start placing tiles on the floor by removing the backing from one side. Make sure not to put figures on the side that you have peeled because the adhesive has been attached and it will be removed.
To make the room look less dirty, keep throwing the backing as soon as you peel. Moreover, it is better to stick the tiles to the floor as soon as you have removed the backing otherwise it will be tough for you.
Start with The 1 Corner to Lay Tile
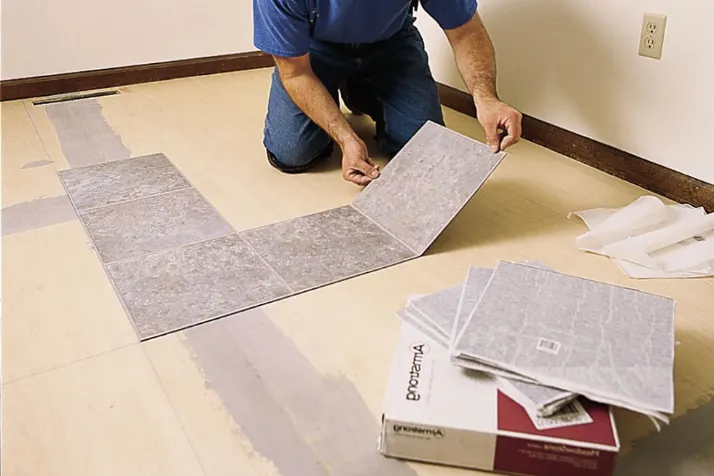
As you have already divided the room into 4 different corners so begin installing the tiles by starting with the first corner. While putting the tiles, ensure they are exactly on the spot where you have made a line with chalk.
Once the tiles are installed, you won’t be able to move the location further.
Install Other Tiles
Once you are done with the first corner, similarly put other tiles and complete the entire room. Do not move to another row before completing the first one to avoid any confusion.
Cut Extra Tiles
If the size doesn’t fit properly, you can cut peel and stick tile with the help of a knife.
3. Finishing is Important
The installation method is incomplete without finishing so do not leave the work here.
Use Rollers on Tiles
If you want that your newly installed self-adhesive tile perfectly fit on the floor then use the best roller over them which could be a vinyl roller.
Start using a roller from one end of the room and apply it in the right direction so that you can cover the entire space. You can also buy these rollers on rent.
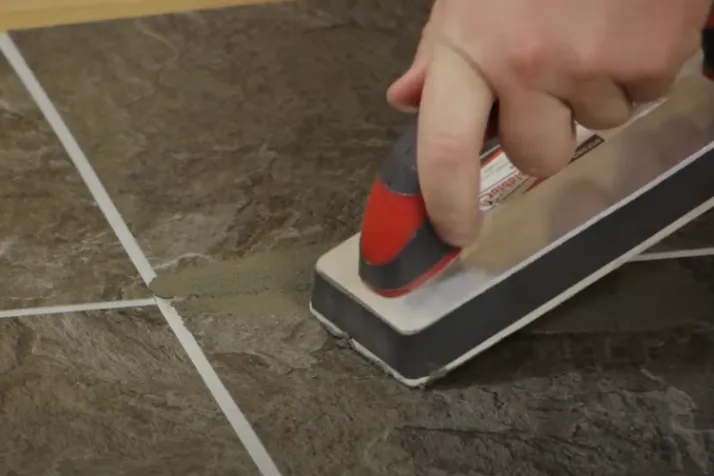
Apply a Grout if Required
If there is any space between tiles where the dirt can enter then do not forget to grout them so that you can prevent any damage. However, you can skip this step if it is not required.
Avoid Cleaning Floors for Some Days
Once you are done with everything, leave the work here for at least 5 days so that the tiles are completely attached to the floor. However, you can do light cleaning by using a vacuum or a sweep.
Better avoid entering that room where you have just placed the tiles so that it doesn’t become dirty. You are all done.
Is It Easy to Install Vinyl Tile?
Yes, it is easy to install these vinyl tiles. Among all the floors I’ve laid, peel-and-stick vinyl tiles are the easiest to install. You can effortlessly cut them with a utility knife. Unlike other types of flooring, there are no interlocking sides to deal with, which can be a challenging task to connect perfectly.
One of the best features of vinyl tiles is that you can easily replace just one tile if it gets damaged, even if it’s in the middle of the room.
Moreover, if you already have a flat, undamaged floor, you don’t need to prepare it. After cleaning it up, you can directly lay the peel and stick tiles on it.
FAQs – Frequently Asked Questions
Do you have some other questions regarding this sticky tile floor or peel-stick flooring? Let’s point out a few common queries that still confuses people about how to lay peel and stick tile. The questions are:
Where Do You Start Lay Peel and Stick Tile?
You have to start laying it from one row and not move to another row before completing the first one. It is better to mark the spot with a chalk line so that it is easy for you to properly lay them.
Do You Need to Put Anything Under Peel and Stick Tiles?
Peel and stick tiles are already sticky due to the adhesive installed on the back side so you do not need any other adhesive to stick them. Simply peel the back side and start placing it on the surface. Once you have placed them, you won’t be able to move them.
How Do You Prepare Surfaces for Peel and Stick Tiles?
You first have to remove the baseboard with the help of a pry bar or you can also take the help of pair of nippers to remove all the nails. Once the baseboard is removed, also get rid of the uneven existing surface.
After that, take a putty knife or a utility knife and start scratching the already used adhesive from the floor to make the surface tidy. It is all ready for the new installation.
How Long Does it Take for Peel and Stick Tile to Be Used?
Once you are done with the installation and you have done finishing as well, let the surface free from any foot traffic for at least 5 days. After that, you can use it.
How Do You Finish the Edges of Peel and Stick Tiles?
In order to finish the edges or corners, get your hands on the best roller. You can rent a vinyl roller that is best in this regard.
Final Thoughts
Tile installation is not a complicated task and especially when the tile is peeled and stick. You do not need any adhesive material or to follow any tough process to make this work done.
Must have all the essential tools and supplies so that you can quickly finish the work without any trouble. You can also hire someone if you do not have enough time for this work.
I have covered every step in detail for those who are just beginners and have zero knowledge about tile installation work but want to know how to lay peel and stick tile.
However, it is always great to learn a new skill so try to do this work at home as you can take help from other family members.


Leave a Reply