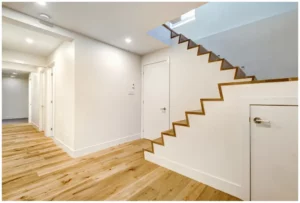
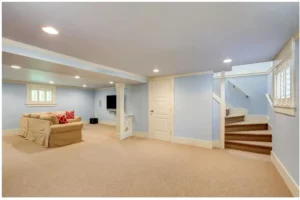
Finishing your basement adds value to your home and you can find extra space for your entertainment. Many people often drop this plan due to all the costs they need to finish. But wait. What if you can do it within your budget?
Yes, you heard it right. Now finishing your extra room or basement can be done within a budget. If you want to know in detail, this guide will be advantageous.
You only need to invest some time, effort, and energy to make your extra space delightful and pleasing to the eyes. Let’s begin the guide and discuss how to finish your basement.
At a Glance – How to Finish Your Basement
- It’s a great idea to install the insulation against your basement wall for proper cushioning and decoration.
- Install the bottom and top plates at an equal level to mount your basement wall.
- Now, connect all the utilities on the wall; if you find any difficulty, you can hire a professional for this installation.
- Bring the drywall and cut it into vertical or horizontal sections. Use dry-wall tape to install them and apply the paint to give an attractive finish to your basement.
Things to Remember When Finishing Your Basement
You might have often asked or heard this question before. In this article, you will get various Finished basement ideas that will be unquestionably helpful for you.
However, before starting the process, you need to be mindful of a few things. Let’s talk about them first.
 Your Basement Should be Tidy
Make sure that your basement should be purely clean before starting the work. Remove all the dirt, extra boxes, or whatever unnecessary items it has. You can use an electric floor mop for this purpose.
 Humidity Test
It is one of the most important steps that people often don’t check. It is always better to inspect whether the walls are waterproof where you will begin the work?
If your basement has damp walls, it would not be easy to finish them. It is a common problem that can be fixed with proper precautions. It would help if you spent a little to overcoming it.
 Permit is Important
To finish the basement, a permit is one of the major steps to be taken. You need permission even if you are doing it within your house.
Without asking for permission, you could be charged with a fine. Hence, ask the local government if you ever plan to finish your basement.
 Collect Necessary Tools
To save your time, gather all the necessary tools that would be applied during the entire finishing process.
A few tools you might have at home, but a few need to be purchased, or you can also take them on rent. A few of the tools include:
- Hammer
- Nail gun
- Drywall jack
- Ladder
- Masonry drill and bits
- Durable pants
- Dusk mask
- Tape measure
- Circular saw
- Hearing protection
- Insulation adhesive
- Utility knife
- Sawhorses
Materials:
- Ceiling tiles
- Framing nails
- Utility locations
- Trim styles
- Flooring type
- Paint colors
Now that you have brought all the necessary items, it’s time to begin basement remodeling.
Small Finished Basement Ideas
1. Finish a Basement Wall
The steps needed in this regard include:
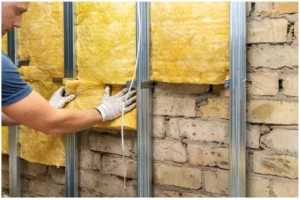
Step 1. Install Insulation
The first step required is to finish a basement wall for which you need to install the insulation. Seize the measuring tape and estimate your wall by putting the tape from floor to ceiling.
Take out the knife and cut the insulation by deducting the measuring ¼ of an inch. To make sure that you have counted the right height, retain your insulation against the wall.
Now pick your adhesive insulation and as per the recommended time, press it against the wall.
You have to cover all the walls and squeeze them until it is entirely done. Now that you are done with the installation, the next step requires sealing between the gaps to eliminate the humidity issue.
Step 2. Mount the Wall
Framing basement walls is the next step. Define an edge on the floor four creeps from the walls. Ensure that the line crosses any walls at an angle of 90 degrees.
Measure your wall into 2×4 lengths as they are your bottom and top plates, so it would be better if you did it twice. To place the stud, measure the plates to 16 inches.
To install the bottom plate, you acquire nails and a masonry drill. Start from the end and keep adding additional nails on 16 inches mark.
For safety, don’t forget to wear your safety equipment. Now, you need to follow the same instructions for top plate installation. However, instead of a masonry drill, use a nail drill.
Once you are done, ensure that plates are installed on an equal level. To install the studs, cut them equally with a 16-inch mark. For installation, use a nail gun.
Keep doing these steps unless all your walls are mounted.
Step 3. Install Utilities
To install all the utilities for the walls inside working, we would suggest hiring any professional. Otherwise, you might harm yourself. If you are done with this step, proceed to the next one.
Step 4. Install the Dry-wall
Dry-wall is a material that is specifically used to design walls, so in order to install them for basement finishing, you need to decide whether it should be vertically or horizontally.
You can choose according to your room’s space. To cut the appropriate sections of the drywall, you should take a dry-wall knife that will let you do equally cutting.
You can remove the dry-wall section from the places where you have to uncover room utilities. If you see any seams on the wall, fill them with dry-wall mud so that they don’t look odd.
You can also use dry-wall tape. Now to cover that mud, you can apply paint, however, before applying the paint, better to use a primer first.
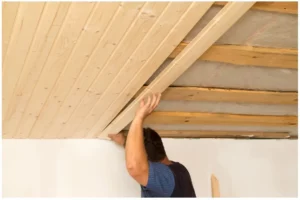
2. Finish the Basement Ceiling
Now you are done with the wall finishing; you are all set to finish the ceiling; that is the next step.
For finishing the ceiling:
Step 1. Install Drop-Ceiling
Drop ceiling installation requires an installation kit to easily make the installation done. For this purpose, you need to get your hands on the necessary kit.
To begin the installation, mount frames of L-channel on the wall. Later, mount T-channel frames that should be attached to the L-channel frames. Once done, locate the tiles on the frame.
Here you go with the drop-ceiling.
Step 2. Dry-wall Ceiling
Now comes another installation that is as similar as the above one. In a dry-wall sheet, mark the holes and later cut them equally in order to attach the utilities.
Now use adhesive in a place where you want to hang the dry-wall sheet. Keep pressing unless it is connected properly.
To cover the entire ceiling with the drywall, use a screw or a nail every 7 inches around the wall. Repeat the process unless and until the whole wall is covered.
To fill the seams, use dry-wall mud. Later use paint on the mud part. It is how you install a dry-wall ceiling.
Step 3. Open Ceiling
As the name describes, it remains open, giving a different look to the room. However, if you don’t like it to stay open, you can cover it with paint.
3. Finish the Basement Floor
The last thing is to finish your basement floor. You have various options to choose from for floor finishing.
However, you can also go for the carpet but better to choose low-maintenance laminate or vinyl flooring.
If you are planning to choose wood, better to drop the idea here due to the moisture that attracts the basement more.
Instead of directly opting for the flooring, don’t forget to install the subfloor first, as it will give more comfort and dryness.
Once you are done with the subflooring, hire a professional who will install the floor.
Pros and Cons of Basement
Basement or no basement? Let’s talk about a few pros and cons of basement finishing that might help you opt for a decision.
Advantages
- You get additional space in your house where you can find quality time.
- Your basement adds value to your home.
- For your noisy activities, what could be better than a basement?
- In summer you can have a refreshing time.
Disadvantages
- It demands an additional cost.
- You have to face humidity issues.
Conclusion
Still, confused about whether you should go for a basement or not? Why not when you can have a relaxing place where you can have a good time.
The design of the basement and the interior design plays a vital role when it comes to the in-house looks of your build.
I have mentioned a few best and easy ways to furnish your basement that wouldn’t cost much. By following this step-by-step guide, you can do it.


Leave a Reply