Is your water heater not working properly? The thermostat can be faulty if you are not getting hot water as it should be. It has two main parts responsible for heating water; upper and lower.
Its upper part is damaged if you turn on a hot water tap, but cold water runs out. In case of a faulty lower part, when you turn on the hot water tap, first you get hot water, then it gets cold quickly.
Testing a thermostat is a better way to identify which part is not working. Once you have detected the problem, it becomes easy to fix. This article will teach us how to test a water heater thermostat. Keep reading!
How Does Water Heater Thermostat Work?
In an electric water heater, the thermostat’s location is at the front of its tank, under the access panel. A thermostat keeps the water hot inside the tank. A 30-gallon water heater comes with two heating elements, each with a thermostat.
The upper thermostat is the main one, and the lower one spots the change in the temperature of the water. Upper and lower thermostats do not possess the same features and do not work at the same time.
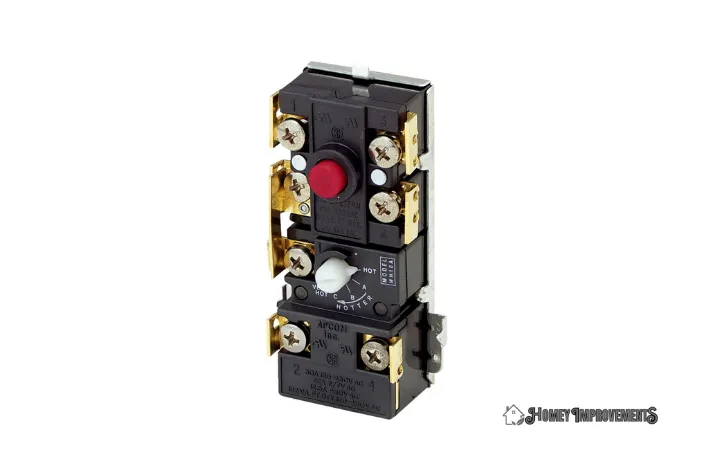
There is also a button on the upper thermostat. When water exceeds 170 Fahrenheit, you can turn off the heating process by pressing this button. You can press this button to restore the unit to its default setting.
You must adjust both thermostats to similar temperatures to set them on the water heater. Smaller water heaters’ temperature is controlled by one thermostat and heating element.
Identifying Which Thermostat is Not Working
The thermostats are wired so that only one heating element is ON at a time. The upper thermostat heats the top 1/3 of the water inside the tank to the temperature you set.
After heating the top layer of water, the upper thermostat turns off, and the lower one turns on. When one of these thermostats fails, the water heater will react differently. This can also be the reason for your water heater taking a lot of time to heat up to only a few degrees.
Detecting Which Thermostat Failed
Failure of Upper Thermostat
Your water heater will not heat the entire water due to the faulty upper thermostat because the upper thermostat controls the lower one, so the lower one will never work if the upper fails.
Failure of Lower Thermostat
If the lower thermostat is not working, you will find that the hot water changes to cold water quickly or is lukewarm. Its reason is that the upper thermostat heats 1/3 part of the tank’s water, but the lower one is defective and cannot switch on the lower heating element.
How to Test Water Heater Thermostat?
Follow the steps below to check if your water heater thermostat is defective.
 Turn Off Power Supply to the Water Heater
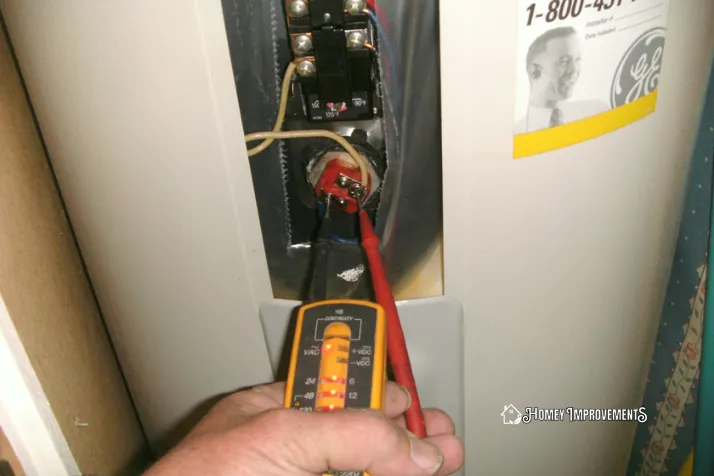
It is impossible to test the thermostat while the power is connected. Two hundred forty volts of power can flow through the circuit, which is dangerous for you. So, switch it off at the circuit breaker or disconnect it from the power outlet.
It’s recommended to turn it off from the breaker. Usually, your house’s electrical panel is in the garage, storage closet, or basement. Find the breaker with the name Water Heater and turn it off.
 Gain Access to the Thermostat
- A cover plate will be fixed on the water heater with one or two screws.
- Take a screwdriver, remove them, and keep them in a safe place.
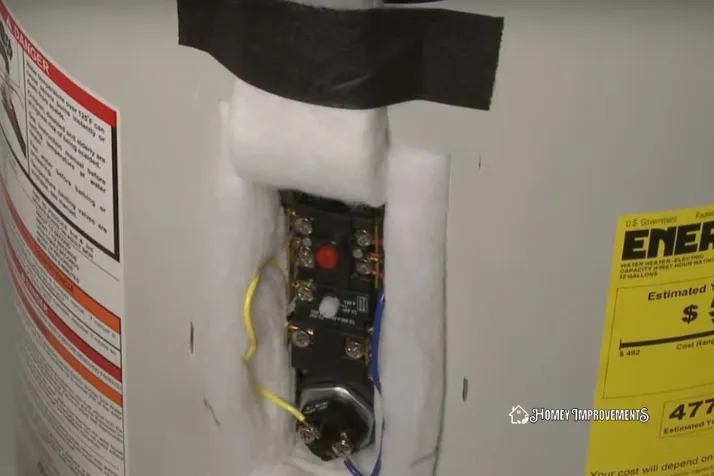
- After unscrewing the bolts, you will see insulation that has covered both the thermostat and element. Attach it to the unit with duct tape so you can easily work there.
- If there is any plastic cover on the thermostat, take it out. After removing all this, you will see the thermostat, heating element, and reset button.
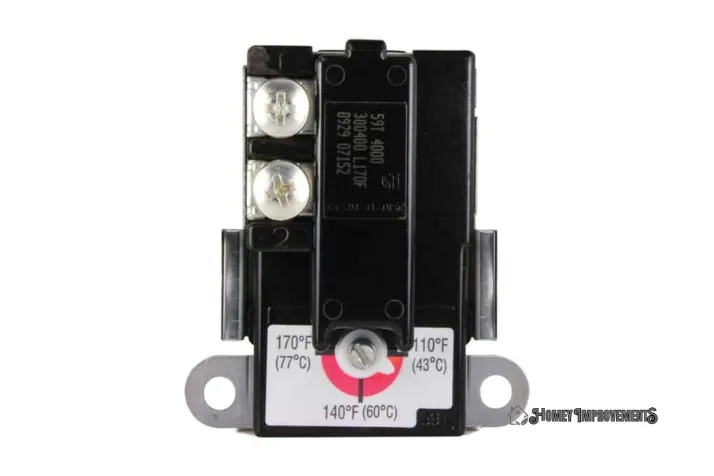
You will find a thermostat temperature alteration dial resembling a big plastic bolt. Its function is to adjust the thermostat’s temperature settings.
 Examine the Reset Button
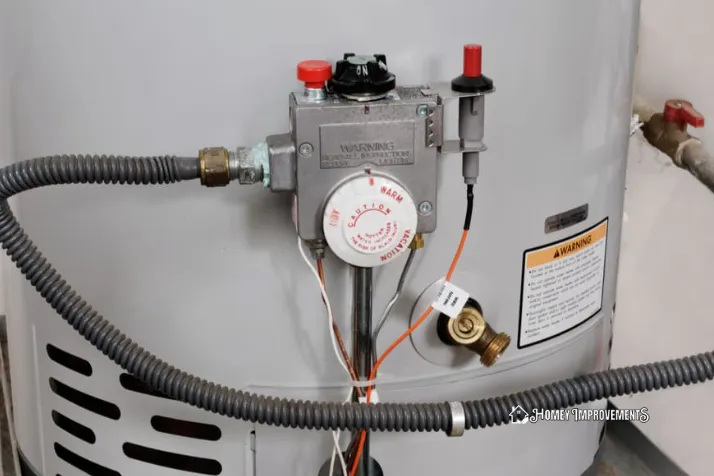
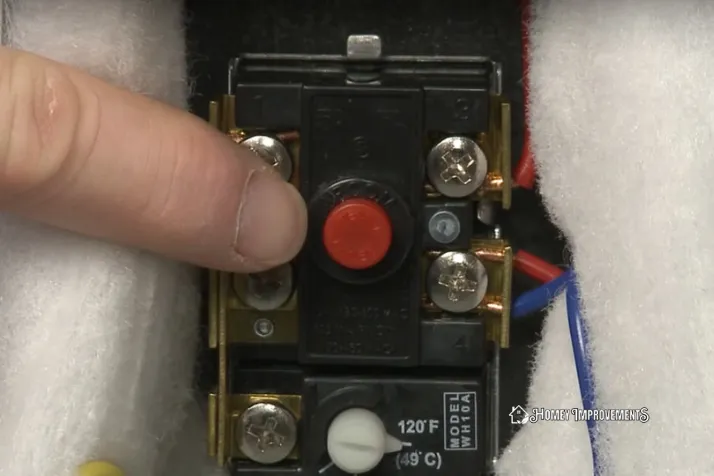
Sometimes the reason for no hot water is due to the slipping of the reset button. Though, it might be due to a damaged thermostat or a problem with the heating element. If the reset button has tripped, press it until it makes a click sound.
If you don’t hear any sound, keep pushing it for five seconds. Your water heater may start working by doing so. But, it is recommended to test the thermostat and heating element for continuity.
 Test the Continuity of Thermostat
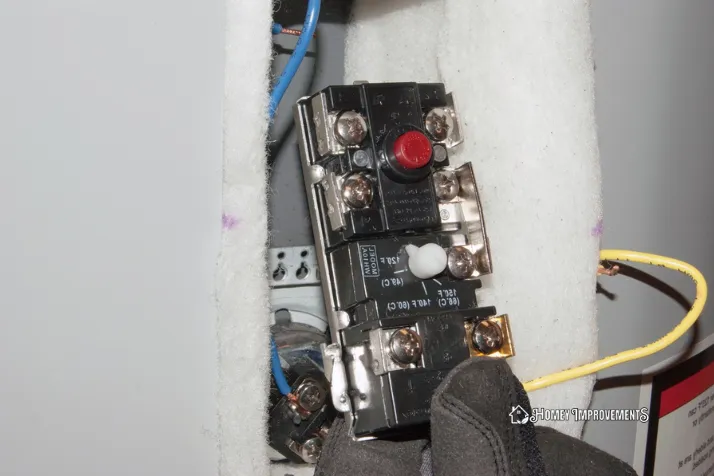
- First, take a picture of the wires to remember how they are connected.
- Loosen the bolts and disconnect the wires.
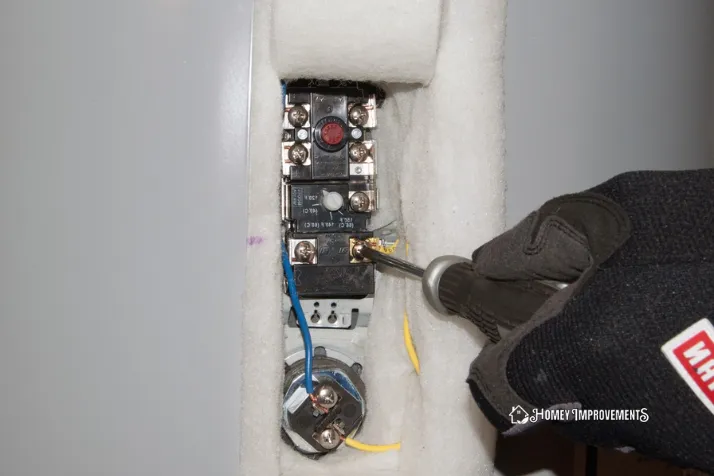
- Take a flat head screwdriver and move the thermostat temperature adjustment dial to the hottest setting.
- Turn the dial of the multimeter to the smallest resistance settings ohms.
- There will be screws on the thermostat. Place one of the multimeter’s leads on the left side screw and examine the multimeter reading.
- Similarly, check the reading on the other side by keeping the multimeter leads on the right side.
- Now, turn the thermostat temperature dial to the lowermost settings using a flat head screwdriver.
- Repeat the above steps with the right and left parts of the thermostat terminals.
The thermostat should read zero ohms in both the tests above. If you get any other figure than 0, it will show that the thermostat is damaged and should be replaced.
Buying New Water Heater Thermostats
When you discover that your thermostat is damaged and must be replaced, it would be best if you replace both parts. You can buy them within a kit, or separate ones are also available.
Purchasing a Tune-up Kit
In a tune-up kit, you will find a set of the upper and lower parts of the thermostats and two new heating elements. It might be costly, but you will find a difference in the performance of your water heater in most cases.
This is a good option if your water heater is not old and has more years of service. If you want to replace the heating elements, you must purchase them according to the size and type of the water heater. You will also require to drain the water heater for replacing the heating element.
Purchasing Upper or Lower Thermostats
Changing both thermostat parts is a good idea, but sometimes replacing only one part will solve the issue.
You can replace the parts of the thermostats if you can’t afford to buy a new water heater and you want your current unit to keep working.
Water Heaters with Single Element
Some water heater uses a single heating element to heat a 20-gallon tank. Their water heater thermostat wiring is connected differently; only a single element is required.
Water Heater Thermostat Replacement
Like an electric switch, replacing an electric water heater thermostat is easy. Make sure you turn off the power supply and examine the voltage in the wires before you begin to prevent accidents.
When you are getting extra hot water, changing both thermostats is good. If the problems have occurred due to one part, you must change both of them because they are not so costly.
It is recommended to replace the product with the same brand. If it is not available, you can select a similar one. Use a non-contact voltage tester and screwdrivers during this process.
Disable the Power Supply
Turn off the power supply connected to the water heater and use the same steps to locate the thermostat as we mentioned above in this article.
There must be no current in the thermostat. To check the screw terminals and wires, you can use a non-contact voltage tester.
Pick Out the Defective Thermostat
Taking a picture with a camera is a good idea to remember how wires are connected. Use a screwdriver to take out the bolts on both terminals. Now take out wires from both screws.
Remove the thermostat from its chamber by freeing it from its attachment clips. Don’t apply force excessively to avoid any harm to the clips.
Setting Up New Thermostat
Take the new thermostat and fix it on the corresponding clips correctly. Attach both the wires of the circuit to the terminals of corresponding screws. Tighten the screws to lock them.
Regulate temperature settings on the thermostat as you need. To do this, you will need a screwdriver with a flat head. It is recommended to set the temperature to 120 degrees Fahrenheit.
Final Touches
Close your thermostat’s insulation and chamber panel and turn on the power supply. Switch on the water heater and wait for two hours before checking the water. After two hours, open any hot water tap and check if the water has become hot.
Adjusting Water Heater Thermostats
The default setting is 140 degrees Fahrenheit by most manufacturers. But, this setting will consume more energy if you set it for residential needs. Save your money by putting it at a lower temperature.
Turn off the power supply and get access to the thermostat. You will see a dial with a pointer set to a designated temperature. Use your screwdriver to adjust the temperature according to your needs.
The best temperature is between 120 degrees Fahrenheit and 140 degrees Fahrenheit. After adjusting the cover, put back all its components and turn on the power supply.
Why Does My Water Heater Keeps Switching Off?
Sometimes after adjusting the temperature and ensuring all its components are working fine, the water heater continuously shuts down.
This problem occurs due to the reset button located at the thermostat. When the water inside the water heater’s tank becomes too hot, the reset button transfers the power to the heater. Some reasons are described below:
- If your heating element has completed its lifespan, it will no longer work fine. If it has aged, the tank’s water will become extra hot, and the reset function will not work. This causes the heater to shut down.
- The energy-Cut Off (ECO) switch prevents water from getting too high and is used for safety with a reset function. Over time, it wears out and breaks.
- If all the other things are working fine, the tripping of the reset switch might be due to a short circuit and faulty wiring.
FAQs – Frequently Asked Questions
How to Know if My Water Heater is Not Working?
The following signs will show you that your water heater is bad:
- It is not providing hot water.
- At the start, supply hot water, but suddenly water gets cold.
- Recovery of hot water is low.
How to Reset a Water Heater Thermostat?
By looking carefully, you will find a reset button somewhere on your water heater. Its color is red and usually is situated near the thermostat. On some units, it might be hidden by a metal plate and covered with insulation. When you find it, push it to reset the heater.
How to Test a Thermostat with a Multimeter?
Make sure you have turned off the power supply. Touch a lead of the multimeter to the left side bolt and check the reading repeat the process with the right bolt. The thermostat should read 0 ohms. If it shows any other number, it is defective.
Are the Upper and Lower Elements of the Water Heater the Same?
The upper portion is responsible for heating the upper part of the water, while the lower part must heat the remaining water. When the upper element reaches an adjusted temperature, it shuts off automatically. It is a cost-effective and efficient feature to heat the water regularly.
How to Know that the Thermostat is Working Fine?
The following things will tell us about a broken thermostat:
- If the thermostat has no power.
- The heater is not turning on.
- The heater doesn’t turn off.
- The temperature of the thermostat doesn’t match the room temperature.
Final Thoughts
You can test your thermostat when your water heater is not working fine. If the issue can be fixed by repairing it, you won’t have to replace it. I hope these effective ways to test the water heater thermostat will be helpful for you.
If your heating element is aged and a short time is left in its lifespan, then it is normal that it will not work properly. In this case, you must replace it. To prevent accidents, remember to turn off the power supply before starting work in an electric water heater.
 Turn Off Power Supply to the Water Heater
 Examine the Reset Button
Leave a Reply